¶ Prerequisites
This guide assumes you know very little about Linux. That said you should at least have enough understanding of the shell to be able to type commands and use the nano text editor[0]. Having a grasp of shell navigation, filesystem, services and networking is not required but will definitely help you.
Some of the commands listed below are required to run with elevated privileges. Thus in this guide they are prepended with sudo. Use what method your prefer for running elevated commands: typing sudo before every command, summoning an elevated interactive shell with sudo -i or logging in as root.
Finally, this guide is not distribution agnostic as it was written with Debian based distros in mind. Package manager commands like apt and dpkg and other Debian specific programs are not available on other families of distros and will not work. Therefore you will have to replace them with their appropriate counterparts.
¶ System updates
First let's start by updating the whole system.
sudo apt -qqy update && apt -qqy dist-upgrade && apt -qqy autoremove
Then let's setup automatic updates.
¶ Automatic updates
Updating your system automatically is very handy. Although there are risks with applying updates automatically, they also exist when you don't. Like all things, it's a tradeoff.
If the server will be made publicly accessible you should at least configure automatic security updates.
Install unattended-upgrades then run the dkpg-reconfigure command with the flag --priority=low.[1]
sudo apt install unattended-upgrades
sudo dpkg-reconfigure --priority=low unattended-upgrades

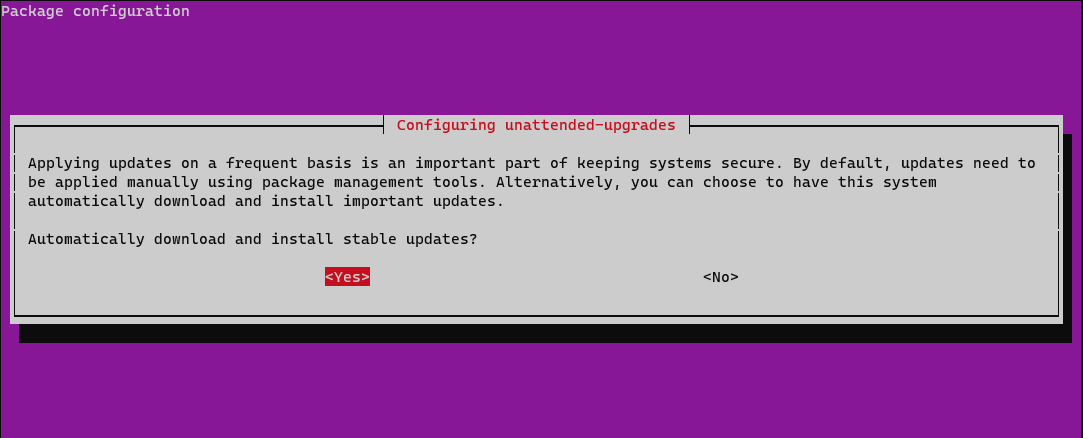
Select Yes in the Package configuration menu to enable unattended updates.
We will also open the following config file…
sudo nano /etc/apt/apt.conf.d/20auto-upgrades
…and make sure these values are correct.[2]
APT::Periodic::Update-Package-Lists "1";
APT::Periodic::Unattended-Upgrade "1";
¶ User privileges
Logging in as root is unsafe and not recommended, especially if you're connecting remotely to your machine and even more so over the internet. You should use sudo instead.
¶ Use sudo
To avoid using the root account we will create a new user with sudo privileges.
There are many ways to do this, namely with adduser or useradd.[3]
We'll use useradd for the purpose of this guide.
In one command we can create our user with the following options:
- create user home directory
- set bash as default shell
- assign user to sudo group
sudo useradd -m -s /usr/bin/bash -g sudo <user>
We then set user password with passwd.[4]
sudo passwd <user>
We can now log in as the newly created user with su <user>.
If you're on a VPS, the cloud provider may already have assigned you a default
sudouser. You may want to change it. You could either change the user's name or create a new account and disable the old one entirely.
¶ Disable root
Since we have at least one sudo user, it is now safe to disable the root account. The following command will lock the password for the root user. You won't be able to log in as root with its password until a new one is set.
sudo passwd -l root
¶ SSH setup
SSH is a protocol that allows for connecting to a remote account on another computer in a secure way, either on the same network or over the internet. It's the standard way of interacting with any server as it avoids us from physically accessing the machine we want to configure.
On the server, install the openssh server package and its dependencies.
Then enable and start the service/daemon.
sudo apt install openssh-server -y
sudo systemctl enable ssh
sudo systemctl start ssh
At this point we can either remote into our ssh server right away or configure it further to make it a bit more secure. This is preferred if your server is publicly hosted. But if you'll only access it from your home network this is as far as you'll need to go.
On your local machine, install the openssh client package and its dependencies.
sudo apt install openssh-client -y
Your can now remotely log in as a user of the server from your local machine.
ssh -p <port> <remoteUser>@<serverIP>
¶ Key-based auth.
A good security practice is to authenticate with an ssh key rather than the remote user's password. An ssh key allows for a specific <localUser>on their <localMachine> to connect as a <remoteUser> on their <remoteMachine> in a secure way.
To do so, we generate an ssh key pair on the client machine which will be tied to the account of the machine it was created with. The private key will stay on the client machine and should not be shared, while the public key will be uploaded to the home directory of the account of the remote machine we want to connect as. This is very handy as it allows us to share our public key multiple times and connect to as many servers as we want.[5]
From the client machine run the following command to generate your ssh key pair:
ssh-keygen -b 4096
You should get the following output...
Generating public/private rsa key pair.
Enter file in which to save the key (/home/<localUser>/.ssh/id_rsa):
Hit ENTER to use the default id_rsa file name.
Enter passphrase (empty for no passphrase):
Enter same passphrase again:
You can either enter a passphrase or hit ENTER twice.
Setting up a passphrase means each time we want to use the key, we have to decipher it with its passphrase. It's an added security layer that can prevent bad actors from using your key if your client machine ever gets compromised. But it also hinders the ability to ssh into a machine using a script as it'll prompt for a password when you want to use the key.
Your identification has been saved in /home/<localUser>/.ssh/id_rsa
Your public key has been saved in /home/<localUser>/.ssh/id_rsa.pub
The key fingerprint is:
SHA256:XXXXcQpGJIzWUm2X99LsbRF45l7XBnogtEjaymcXXXX <localUser>@<localMachine>
The key's randomart image is:
+---[RSA 4096]----+
|XXX..  .XXX..    |
|=B . o * +.o.+.  |
|+ . o o = =.+o...|
| . . o . o +.o..+|
|  . o + S o o.o..|
|     o + . . +   |
|            .    |
|                 |
|                 |
+----[SHA256]-----+
With the key pair generated, we can then upload the public key to the server.
ssh-copy-id <remoteUser>@<IP>
If you get the following message, type yes and hit ENTER to continue.
/usr/bin/ssh-copy-id: INFO: Source of key(s) to be installed: "/home/<user>/.ssh/id_rsa.pub"
The authenticity of host '[X.X.X.X]:<port> ([X.X.X.X]:<port>)' can't be established.
Are you sure you want to continue connecting (yes/no/[fingerprint])?
Then you will be prompted to enter the <remoteUser> password of the <remoteMachine>
<remoteUser>@<remoteMachine>'s password:

Number of key(s) added: 1

Now try logging into the machine, with:   "ssh -p '22' '<remoteUser>@<IP>'"
and check to make sure that only the key(s) you wanted were added.
With the ssh-key setup completed we can now securely connect to the server.
¶ Edit SSH config
Now that we have secured our connection client side, tuning the ssh server will help protecting against potential attacks.[6]
We'll have to edit the ssh daemon config file. It's actually best to work on a copy of the original file so that's what we'll do.
sudo cp /etc/ssh/sshd_config /etc/ssh/sshd_config.d/custom.conf
sudo nano /etc/ssh/sshd_config.d/custom.conf
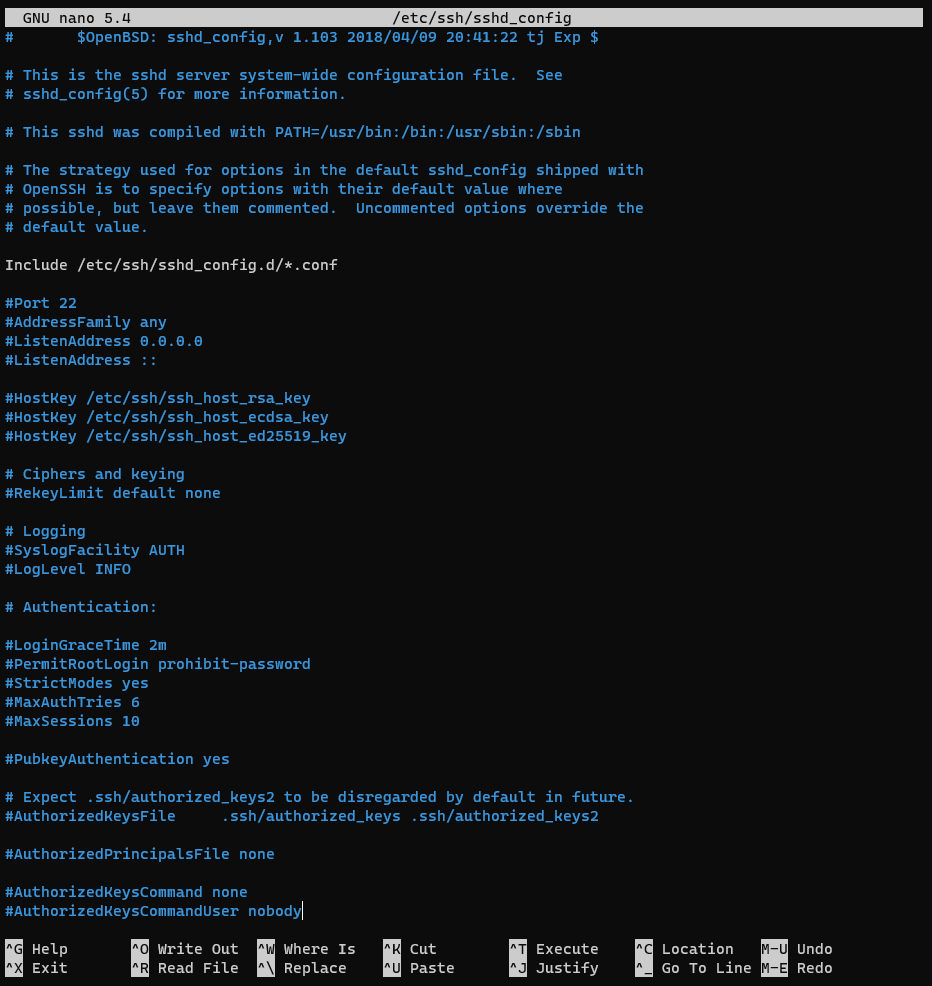
 Opening the config file we can see that almost every line is commented
Prepend the following line with a #
Include /etc/ssh/sshd_config.d/*.conf
The default config file located in /etc/ssh/ssdh_config/ scans all files ending with .conf that reside in /etc/ssh/ssh_config.d/. Commenting this line will prevent our new custom.conf file from recursively referencing itself.
Each time you change anything in your sshd config file, you will either have to reload or restart the ssh daemon for your changes to take effect.[7]
When you are sure to commit to the changes you've made in your sshd config file run the following command.
sudo systemctl reload sshd.service
Be cautious when modifying the sshd configuration. Loading a bad config file could impede your ability to start new ssh session, thus locking you out of the server. You would then have to physically access the server to fix your mistake. To circumvent this issue, it is recommendend to keep your current ssh session alive while reloading the daemon. Then, try to connect to the server from a second seperate ssh connection. That way if something goes wrong you will still be able to rollback your config from the first ssh connection. It goes without saying you should not try to reboot your machine to restart the ssh daemon.
¶ Change the default ssh port
By default, ssh servers listen on port 22. This isn't ideal as bad actors always scan your public IP for this open port and try to force their way in. While there isn't really anything they can do with just that information, it's annoying because all of this added traffic builds up in your logs, adding noise to them and taking space on your disk. So you should change it to an unused port on your server. Preferably something exotic that you'll be able to remember easily.
In the sshd config file, search for the line beginning with Port, uncomment the line and change its value accordingly.
Port 69
Keep in mind that this is considered "security by obscurity". It may help avoid filling your logs when bots scan your common network ports. But it does not - in any way - protect you from a motivated attacker that would just scan all your ports.
¶ Disable password authentication
Since we can now log in with ssh keys, we might as well disable password authentication.
Disabling password authentication will protect you against password attacks.
In the sshd config file, search for the line beginning with PasswordAuthentication, uncomment it and set it to no.
Do the same for ChallengeResponseAuthentication and usePAM.[8]
PasswordAuthentication no
ChallengeResponseAuthentication no
usePAM no
¶ Set static IP
Unless you're running a VPS - in which case your network config will come baked in - you'll want to to set your server to use a static IP adress. A fixed IP address will prevent the DHCP server from changing your server's IP configuration.
Check you current ip address
ip -br -4 a
¶ Bibliography
¶ References
0. How to use nano - linuxsize.com
1.--priority usage in dpkg-reconfigure - askubuntu.com
2./etc/apt/apt.conf.d/20auto-upgrades - wiki.debian.org
3.adduser vs useradd - linuxhint.com
4. PASSWORD //todo
5. SSH key-based auth //todo
6. SSH config //todo
7. SSH reload vs restart - learn.redhat.com
8. SSH passwordAuthentication - superuser.com
¶ External Sources
- “Before I do anything on Linux, I do this first…” by Techno Tim - youtube.com
- "How to Make Your Own VPN (And Why You Would Want to)" by Wolfgang's Channel - youtube.com